
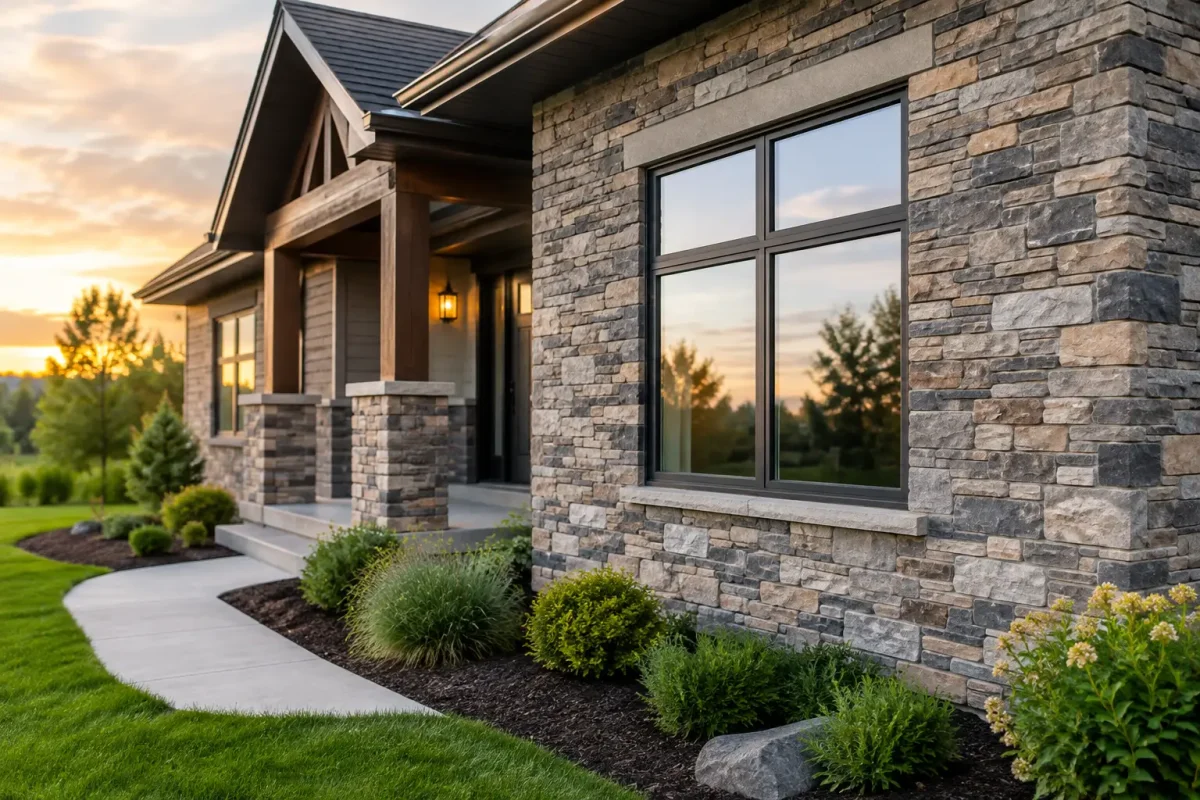
A home can have a sound roof, clean gutters, and new windows, yet still look dated from the street. Manufactured stone veneer siding changes that quickly when it is used in the right places. It gives a home the depth and character of masonry without the weight, structural demands, or cost of full-bed natural stone.
For homeowners planning an exterior update, stone veneer is rarely an all-or-nothing decision. The best results usually come from pairing it with quality vinyl, fiber cement, or engineered wood siding to create a balanced exterior that looks intentional and stands up to the weather.
What Is Manufactured Stone Veneer Siding?
Manufactured stone veneer is a decorative cladding made from cement, lightweight aggregates, and mineral pigments. It is cast in molds taken from real stone, producing profiles that resemble ledgestone, fieldstone, limestone, stacked stone, and other masonry styles.
Unlike full-bed natural stone, manufactured veneer is relatively thin and light. That makes it suitable for many existing walls without major structural changes. It is installed as an exterior finish, not as the wall system itself. Behind the veneer, the home still needs proper sheathing, water-resistive barriers, flashing, and drainage details to manage moisture.
That distinction matters. Stone veneer should improve your home’s appearance and protect the wall assembly, but only when it is installed as part of a complete exterior system. A stone surface alone cannot correct damaged sheathing, missing flashing, leaking gutters, or water entering around windows and doors.
Where Stone Veneer Delivers the Best Return
Covering every exterior wall in stone can make a house feel heavy and can stretch the budget quickly. Most homeowners get a stronger visual result by using manufactured stone veneer siding as an accent material.
The front entry is one of the most effective locations. Stone around a covered porch, lower front façade, or entry columns gives visitors a clear focal point before they reach the door. It also works well on a chimney chase, bump-out, garage surround, or the lower portion of a gable.
A common approach is to install stone along the lower third of the front elevation, then transition cleanly to siding above. This creates contrast without overwhelming the architecture. On a larger home, stone can also help break up broad sections of siding and give the exterior more scale.
The right placement depends on the home’s roofline, window layout, existing brick or siding, and landscaping. A contractor should look at the whole exterior before recommending a profile or layout. A beautiful sample board can look completely different once it is installed across a large wall in direct sunlight.
Why Homeowners Choose Manufactured Stone
Curb appeal is the obvious reason, but it is not the only one. Manufactured stone brings texture that flat siding cannot provide. The shadows, color variation, and irregular edges help an updated exterior feel more substantial from the street.
It also gives homeowners design flexibility. A warm, earth-toned ledgestone can complement traditional architecture, while a cleaner gray stacked-stone profile may suit a more contemporary home. The key is coordinating the stone with the roof, trim, siding color, front door, and existing hardscaping.
From a practical standpoint, stone veneer is typically easier to add during an exterior renovation than full-depth masonry. It can be used strategically while other improvements are underway, such as replacing siding, soffit and fascia, windows, or eavestroughs. Coordinating that work can prevent mismatched finishes and reduces the chance of reopening completed areas later.
Manufactured stone is also durable when it is properly installed and maintained. It does not rot, and it is not vulnerable to insect damage. But durable does not mean maintenance-free. The wall behind it must be protected from water, and the stone itself should be inspected periodically for cracks, loose pieces, damaged sealant, or staining.
The Installation Details That Matter Most
A successful stone veneer project is largely invisible. The most important parts sit behind the finished surface: moisture protection, flashing, drainage, lath or approved attachment methods, and properly prepared transitions.
Water management comes first. Rain can reach behind any exterior cladding, especially around penetrations, trim edges, and transitions between materials. Professional installation uses the correct water-resistive barrier and flashing details to direct water back to the exterior rather than into the wall.
The bottom of the installation needs special attention. Veneer must be kept clear of the ground, roofing surfaces, and other areas where water can collect. Proper clearance helps prevent moisture wicking, staining, and freeze-thaw damage. In colder climates, this detail is especially important because trapped water can expand when it freezes.
Transitions matter just as much. Where stone meets siding, brick, window trim, roofing, or a deck ledger, the connection must be planned rather than covered with caulk and hope. Flashing and compatible trim materials help create a clean line while allowing the exterior to drain properly.
This is why a low price should not be the only deciding factor. A shortcut behind the stone may not show up right away. By the time interior staining, loose veneer, or rotted sheathing becomes visible, the repair can involve removing much of the finished wall.
Choosing a Stone Style That Will Age Well
Stone selection is not just about finding a color you like. The profile needs to suit the home.
Traditional homes often work well with fieldstone, limestone, or ledgestone that has warmer tones and moderate variation. Farmhouse-inspired exteriors can carry a light gray or cream stone with clean siding and dark trim. Contemporary homes usually benefit from a more consistent stacked profile and restrained color palette.
Avoid choosing stone in isolation. Bring siding, roof, trim, and door color samples together before making a final decision. If the home has existing brick that will remain, the new veneer should complement it rather than compete with it. Matching too closely can look accidental, while contrasting too sharply can make the exterior feel pieced together.
It is also wise to think beyond current trends. Very dark, heavily variegated stone may look dramatic on a sample board but can dominate a smaller façade. Neutral stone with natural variation usually gives homeowners more flexibility if they repaint trim or replace the front door later.
Cost Factors to Understand Before You Request an Estimate
The cost of manufactured stone veneer siding depends on more than square footage. Straight, open walls are faster to prepare and install than areas with windows, doors, corners, columns, bump-outs, or difficult access.
Material profile affects pricing as well. Some stones require more fitting and cutting to create a natural pattern. Corner pieces, custom trims, and special accessories add to material and labor costs. Removal of existing cladding, repairs to damaged sheathing, and updates to flashing can also change the scope once the wall is opened.
That is not a reason to avoid an estimate. It is a reason to expect a careful inspection. A detailed quote should explain what is being removed, how the wall will be prepared, which materials are included, how transitions will be handled, and what warranty coverage applies.
When Stone Veneer May Not Be the Right Choice
Stone veneer is a strong option for many homes, but it is not automatically the best one. If the primary issue is active water intrusion, failing gutters, missing roof flashing, or damaged framing, those problems need to be addressed first. Adding a new finish over a moisture problem only hides it temporarily.
It may also be unnecessary if the home already has attractive, sound brick and only needs targeted repairs or a better siding balance elsewhere. In some cases, new siding, refreshed trim, and a well-designed entry can deliver the desired change without adding stone.
A practical exterior assessment should start with the condition of the home, then move to design. That order protects the investment.
Plan Stone Veneer as Part of the Whole Exterior
The strongest renovations do not treat stone, siding, gutters, and trim as separate jobs. They treat them as connected parts of the same weather-protection system. When materials, flashing, rooflines, and drainage are planned together, the finished home looks cleaner and performs better.
If you are considering manufactured stone veneer, ask for an on-site assessment of the walls, transitions, and surrounding exterior components before selecting a color. The right stone can make a major visual difference, but careful preparation and professional installation are what make that difference last.
10 October 2026
Window Styles That Work Hard for Your Home

10 October 2026