
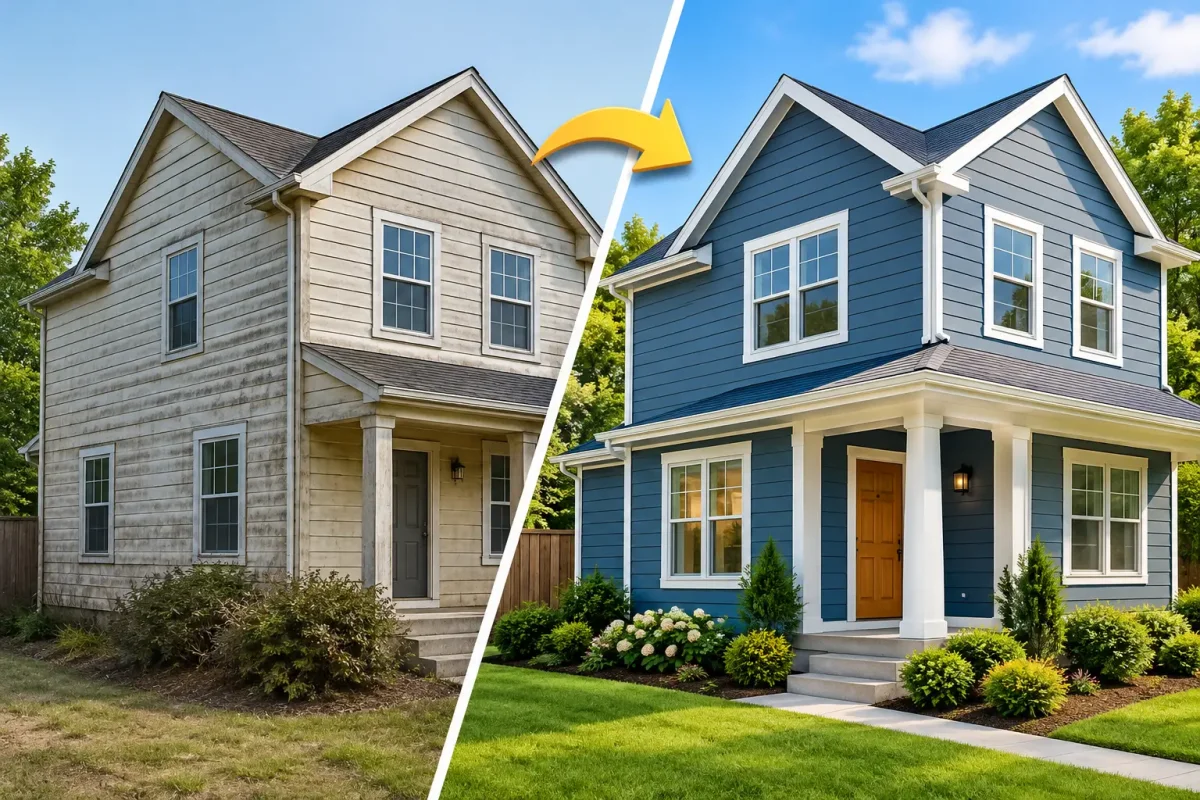
A before and after siding makeover should do more than create a better photo. The real result is a home that looks cared for, sheds water properly, stands up to changing weather, and feels more complete from the street. For homeowners, the visual change is often immediate. The protection behind that new exterior is what makes the investment worthwhile.
Old siding can make an otherwise well-maintained home look tired. Fading color, warped panels, cracked corners, loose trim, and stains near gutters or windows all send the same message: the exterior needs attention. Replacing the siding gives you the opportunity to correct those issues and create a finished look that fits your home.
What Changes in a Before and After Siding Makeover
The most noticeable change is curb appeal. Fresh siding gives the home clean lines, consistent color, and sharper contrast around windows, doors, and roof edges. A light, dated exterior can become more modern with a deeper neutral tone, while a dark exterior can be balanced with warm trim and stone veneer accents.
But siding is not just a cosmetic layer. During a professional project, the exterior is inspected for signs of moisture intrusion, damaged sheathing, failed flashing, or gaps around penetrations. If water has been getting behind old panels, covering it with new material without addressing the cause only delays a larger repair.
That is why a good makeover often includes more than siding alone. Soffit and fascia may need replacement if they are soft, peeling, or poorly ventilated. Eavestroughs may need adjustment when overflow has been staining the walls. Window and door trim may need to be rebuilt so the new siding has a clean, weather-resistant finish. Coordinating these details produces the kind of before-and-after result that looks intentional rather than pieced together.
The Problems New Siding Can Reveal
Homeowners sometimes expect a siding project to be straightforward until the old material comes off. In many cases, it is. In others, removal exposes hidden issues that could not be confirmed from the ground.
Common findings include deteriorated wood around windows, insufficient flashing at roof-to-wall connections, insect damage, and water staining near eaves. These are not reasons to avoid the project. They are reasons to work with a contractor who can identify issues early, explain the repair clearly, and complete the work properly before the new siding is installed.
The trade-off is simple: repairing hidden damage can add cost and time. Leaving it in place risks trapping a problem behind a fresh exterior. A detailed on-site inspection and a clear estimate help reduce surprises, but responsible contractors should still explain what may be discovered once the existing siding is removed.
Choosing Materials for the Right Result
There is no single best siding material for every home. The right choice depends on the architecture of the house, your budget, the level of maintenance you want, and the look you are trying to achieve.
Vinyl siding remains a practical choice for many homeowners because it offers dependable performance, low maintenance, and a wide range of colors and profiles. It can deliver a major visual improvement without pushing the project into a premium budget range. Quality installation matters, especially around trim, corners, and expansion gaps, because poorly installed vinyl can buckle, rattle, or look uneven over time.
Fiber cement and engineered wood products can create a more substantial, wood-like appearance. They are often selected for homes where a higher-end architectural style is the goal. These materials can be excellent options, but they typically require a larger investment and may involve more detailed installation requirements.
Stone veneer works well as an accent rather than a full-wall solution for many properties. Used around an entryway, lower façade, garage, or front porch, it adds texture and visual weight. The key is proportion. Too much contrast or too many materials can make a home look busy. A balanced design usually uses one primary siding color, a complementary trim color, and one accent material.
Color and Trim Make the Makeover Feel Complete
Color selection can make or break the final appearance. A siding sample that looks perfect indoors may appear much lighter in direct sun or much darker on a shaded side of the home. Before committing, view larger samples outside at different times of day and consider the fixed elements you are keeping, including the roof, brick, driveway, and front door.
Neutral colors tend to offer the broadest appeal and remain easier to coordinate if you later replace windows, roofing, or doors. That does not mean every home needs to be gray or beige. Deep blue, forest green, and warm brown can look excellent when the architecture supports them and the trim is selected carefully.
Trim deserves as much attention as the siding itself. Clean window surrounds, well-finished corners, and properly capped fascia are often what separate a basic replacement from a true exterior transformation. The details are especially visible on homes with prominent garages, bay windows, gables, or covered porches.
Plan the Project as One Exterior System
A siding makeover is the ideal time to look at the parts of the exterior that connect to it. Replacing siding first and discovering later that the eavestroughs, fascia, or windows are failing can lead to duplicated labor and compromised finishes.
A coordinated project does not mean everything must be replaced. If your roof is in good condition and your windows are performing well, they may not need to be part of the scope. However, it makes sense to evaluate components that share the same work areas. For example, replacing damaged fascia while eavestroughs are removed is more efficient than scheduling a separate visit later.
For homes in Hamilton, Burlington, and Oakville, this planning also matters because weather exposure varies from property to property. A home with strong wind exposure, heavy tree coverage, or drainage issues may need a different approach than a sheltered home on a newer lot. The best recommendations are based on the condition of your house, not a one-size-fits-all package.
What a Professional Siding Project Should Look Like
A well-managed project starts with an inspection, not a color chart. The contractor should assess the current siding, trim, wall condition, eaves, roofline, and areas where water may be entering. You should receive a clear scope of work that identifies the materials, repairs, finish details, and expected timeline.
Once work begins, site protection and cleanup matter. Landscaping, walkways, and surrounding surfaces should be treated with care. Old siding and debris should be removed regularly instead of left piled around the property. Homeowners should also know who to contact if they have a question while the work is underway.
The final walkthrough is not a formality. It is the time to inspect alignment, trim details, caulking, cleanup, and the overall appearance from different angles. A professional installer should stand behind both the product warranty and the workmanship, so you know where to turn if a concern appears after completion.
Make the After Worth More Than the Before
The best exterior upgrades solve visible problems and prevent future ones. New siding can change the way you feel when you pull into the driveway, but it should also give you confidence that the walls, trim, and drainage details are doing their job.
If your exterior is faded, damaged, or no longer matches the home you want to own, start with a professional inspection. A clear plan now can turn a tired exterior into a cleaner, better-protected home for years ahead.

26 October 2026
What Causes Soffit Water Damage in Homes?

26 October 2026