
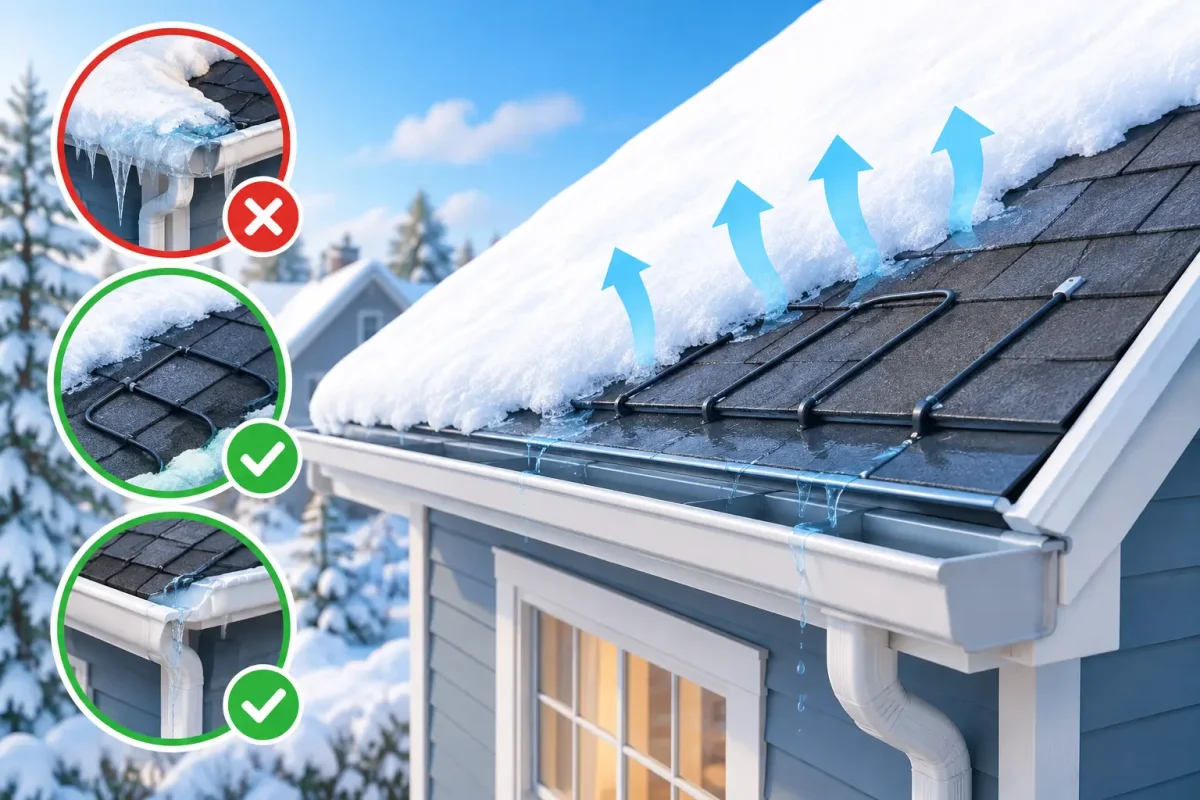
A ridge of ice along the roof edge may look harmless after a snowfall. The real concern starts when melting snow refreezes there, trapping water behind it. That water can work its way beneath shingles, soak roof decking, stain ceilings, damage insulation, and create expensive repairs long after winter ends. To prevent ice damming, the goal is not simply to remove snow or add more gutters. It is to control the heat, airflow, and drainage conditions that allow ice dams to form.
For homeowners, this is a roof-and-attic issue first. A proper inspection can identify whether the cause is heat loss, blocked ventilation, aging roofing materials, poor drainage, or a combination of problems.
What Causes Ice Dams?
Ice dams form when part of the roof is warmer than the lower edge. Snow melts on the warmer upper roof, and the water runs down toward the colder eaves. Once it reaches that cold overhang, it freezes. As the ice ridge builds, later meltwater has nowhere to go except back up under the roofing materials.
The most common cause is heat escaping from the living space into the attic. Recessed lights, attic hatches, bathroom exhaust vents, unsealed wiring holes, and insufficient insulation can all warm the underside of the roof deck. Poor attic ventilation makes the situation worse because warm, moist air cannot move out effectively.
Roof design also matters. Low-slope sections, valleys, dormers, skylights, and areas where snow accumulates can be more vulnerable. Clogged or damaged eavestroughs do not usually create the original ice dam, but they can slow drainage and add weight along the roof edge.
Prevent Ice Damming by Fixing the Heat Imbalance
The most reliable solution is to keep the roof deck as close as possible to the outdoor temperature. That means reducing heat transfer from the home into the attic while maintaining proper airflow from the soffits to the roof vents.
Start with an attic and roof inspection
A professional inspection should look beyond the visible ice. A contractor can check insulation depth and condition, air leaks around attic penetrations, ventilation intake at the soffits, roof vent performance, and signs of moisture or mold. They should also inspect the roof surface for lifted shingles, failed flashing, exposed nail heads, and worn seals around vents and chimneys.
This step matters because adding one component without addressing the cause can waste money. For example, installing more roof vents will not solve a major insulation gap. Adding insulation without air sealing may still allow warm air and moisture into the attic. The right repair plan depends on how your roof and attic are currently performing.
Improve insulation where it is lacking
Adequate attic insulation helps keep indoor heat where it belongs. It reduces the warm spots that melt snow unevenly across the roof. In older homes, insulation may be compressed, uneven, moisture-damaged, or missing around edges and difficult-to-reach areas.
Insulation should be installed carefully so it does not block soffit vents. The attic needs a clear path for outside air to enter at the eaves and exit through roof or ridge vents. Baffles are often used near the roof edge to protect that airflow while allowing insulation to reach the perimeter.
The right insulation level depends on the home, attic layout, and local climate. A contractor can recommend an approach that improves energy efficiency without creating ventilation problems.
Seal attic air leaks before adding insulation
Air sealing is often the missing piece. Warm air rises, and even small openings can send a surprising amount of heat into the attic. Common trouble spots include openings around plumbing stacks, electrical wiring, light fixtures, chimney chases, and the attic access hatch.
Bathroom and kitchen exhaust fans deserve special attention. These fans must vent outdoors, not into the attic. A fan that releases warm, humid air into the attic can contribute to condensation, wet insulation, wood damage, and frost buildup during cold weather.
Air sealing needs to be done safely, especially around chimneys, electrical fixtures, and heat-producing components. This is not a place for shortcuts or incompatible materials.
Keep Soffit and Roof Ventilation Working
Ventilation does not heat the attic or remove an ice dam by itself. Its job is to help keep attic temperatures consistent and remove moisture. A balanced system typically brings air in through soffit vents and lets it exit through ridge vents or other high roof vents.
Soffits can become blocked by insulation, paint, debris, insect nests, or poorly fitted replacement materials. On the roof, vents may be damaged, undersized, improperly placed, or obstructed by snow. When airflow is restricted, warm attic air lingers beneath the roof deck and encourages snow melt.
If soffit, fascia, siding, or roofing work is already planned, it is smart to evaluate the ventilation system at the same time. Coordinating exterior work can avoid duplicate labor and ensure the roof edge, drainage system, and attic airflow all work together.
Maintain Eavestroughs and Roof Drainage
Clean, properly pitched eavestroughs help move water away from the home during milder winter days and spring thaw. They cannot correct an attic heat problem, but they are still an important part of protecting fascia, soffits, siding, foundations, and walkways from excess water.
Before winter, have eavestroughs cleared of leaves, shingle grit, and debris. Check that downspouts are secure and discharge away from the foundation. Look for sagging sections, loose fasteners, leaking seams, or areas where water regularly spills over the edge.
Avoid relying on heated gutter cables as the main solution. They may create a channel for meltwater in certain problem areas, but they do not fix heat loss or poor ventilation. They also require careful installation and regular monitoring. For a home with recurring ice dams, spend the budget on diagnosing the roof and attic conditions first.
Protect Vulnerable Roof Areas During Replacement
When a roof is being replaced, it is the best time to improve protection beneath the shingles. A properly installed waterproof underlayment at eaves, valleys, around penetrations, and other vulnerable areas adds an important backup layer if water gets beneath the shingles.
This protection is especially valuable at the lower roof edge, where ice dams tend to force water uphill. However, underlayment is a safeguard, not a substitute for correct insulation and ventilation. A roof can still suffer from trapped moisture, excessive ice buildup, and stress on gutters if the attic remains too warm.
Good roof installation also includes sound flashing details, proper drip edge placement, secure ventilation components, and roofing materials suited to the roof slope. Small installation details can make a major difference during freeze-thaw cycles.
What to Do When an Ice Dam Has Already Formed
Do not climb onto an icy roof or chip at the dam with a shovel, axe, or metal tool. It is easy to damage shingles, puncture underlayment, bend eavestroughs, or get seriously hurt. Salt products can also harm roofing materials, metal components, landscaping, and masonry if used incorrectly.
If water is entering the home, move belongings away from the affected area and place containers under active drips. Watch for bulging drywall or ceiling stains, which can indicate trapped water. If the ceiling is sagging, avoid the area and seek immediate professional help.
Snow can sometimes be removed from the lower roof with a roof rake while standing safely on the ground. This may reduce the amount of meltwater feeding the dam, but it is a temporary measure. Professional steam removal is often the safest option for significant ice buildup because it removes ice without cutting into the roofing system.
After the immediate problem is handled, schedule an inspection. Water can travel far from the visible leak, so the affected roof section, attic insulation, decking, and interior ceiling should all be assessed.
Signs Your Home Needs a Professional Assessment
Recurring icicles do not always mean there is a severe ice dam, but recurring interior leaks, thick ice at the eaves, frost in the attic, wet insulation, peeling exterior paint near the roofline, or stained ceilings should not be ignored. These signs point to a building-performance issue that can worsen with each winter season.
Homes with recent renovations can also develop problems if new insulation, lighting, exhaust ducts, or roof components changed the attic’s airflow. Older homes may need targeted upgrades rather than a full renovation, while a roof near the end of its life may be better served by addressing insulation, ventilation, waterproofing, and roofing together.
Petra Eavestrough & Siding helps homeowners identify exterior conditions that contribute to water damage, from failing roof edges and ventilation components to worn soffit, fascia, and drainage systems. The best time to inspect is before deep winter arrives, but any recurring leak or ice buildup deserves attention now. A dry attic, balanced airflow, and a sound roof edge give your home a much better chance of getting through the next thaw without a surprise ceiling stain.

7 November 2026
Roofing Estimates: What a Fair Quote Includes

7 November 2026